Chicken & Mushroom Rice Burger + Product Review

>> Wednesday, January 12, 2011


I've decided to have no resolutions this year.

I figured that I don't do too well with them. They have this negative connotation for me and I associate the word with the likes of promises on cereal boxes - 'Get into shape this new year!' Over time, it occurred to me that any resolutions I make would eventually be broken sooner or later.

So instead, I just have goals now. A different word - but to me it has a more positive vibe. I think about how I will follow through with it, and I visualise myself standing on the other side waving the mission accomplished flag.

Here are a few food-related goals on my list...

{one} Learn about different the types of cheese to be able to identify them at the markets and know what kind of drink/food to pair them with.

{two} Make an effort to freeze more left over food and minimize food wastage. Tips here and here. I'm also adopting the FIFO rules - first in, first out! This is a hard goal but I guess once it becomes a habit it wouldn't be too difficult.

{three} Have 5 servings of fruit and vegetable a day. It should be easy most of the times, although I did find myself with around 3-4 servings a day last year.

{four} Update the Recipe Index section of this blog. It has been 'Work in Progress' since its birth. Time to let this baby grow!

{five} Experience more with different types of flours like rye, quinoa, spelt and buckwheat in my recipes.

{six} Bake a fancy and impressive-looking cake that tastes as good as it looks. I tend to bake more rustic, homey kind of treats and don't really use much cream, always cut back on the sugar and sometimes over think the nutritional values of the food I make. I'd like to master a totally decadent, over-indulgent kind of cake though.
  
{seven} Learn to quickly clean and dissemble a whole chicken. I still feel clumsy when I handle large meat.

To elaborate on the last goal -  I have not cooked chicken ever since I've moved to Melbourne. I come from a chicken-loving family where everyone has their own winning recipe. Because of that, it was never required of me to learn to cook the bird (which my salmonella-phobic self is completely fine with!) so naturally, I've been staying away from cooking it now that I'm away from home.

Thankfully, a few weeks ago I was given a packet of freshly cooked chicken to try from Moira Mac. Perfect for as me I didn't have to deal with defrosting and then cutting/cooking the meat after a long day.

Moira Mac’s is a new brand in the ham/salami section of your supermet. The company specialises in cooked poultry products and has become the first company to launch a cooked fresh chicken breast range that contains no preservatives, is dairy free and gluten free. The chicken can be eaten straight from their resealable pack or used as an ingredient in hot or cold recipes.

The range comes in four styles: Mediterranean, Homestyle, Barbeque, and Tandoori. 

I was also told that the product is 100% real chicken breast fillet and is 97% fat free. It also has the Heart Foundation Tick of approval for meeting strict standards for saturated fat and sodium.

I've decided to test the Homestyle chicken with this rice burger recipe I've been thinking about lately. Great when you're pressed for time because this is a super fast meal if you've left over rice and a few other things on hand. The chicken chunks are lean and will work well in salads and sandwiches too!

Chicken & Mushroom Rice Burger
Serves 2
  • 2 cups leftover white rice
  • 1 packet Moira Mac's Homestyle chicken (or replace with beef or pork slices)
  • 2 leaves of lettuce
  • handful (4-6) of oyster mushroom, washed and sliced
  • 1/2 pack of enoki mushroom, rinsed
  • 2 tsp soy sauce
  • 2 tsp mirin
  • 2 tsp sake
  • 1/2 tsp garlic paste 
  • 1/2 tsp ginger paste 
  • empty milk carton
1. Wash the milk carton and cut it across to get a 1cm ring (see photo below):
2. Wrap a quarter of the rice in plastic foil and roll it around until it is circular.

3. Place the rice with the foil in the milk ring and push it down to fill up the ring.

4. Remove the ring and repeat the process to make the rest of the rice patties.

5. Place the rice patties in a pan on low heat.
6. Brush them with some soy sauce for flavouring.
7. In another pan, add a splash of oil and add the garlic and ginger paste. Stir around for a minute.

8. Add into the pan enoki and oyster mushroom. Cook for a few minutes before adding Moira Mac's chicken cubes to heat up.

9. Add the sauces - soy, mirin and sake and let cook for another few minutes.

10. To assemble, place a leaf of lettuce on a rice patty, followed by the chicken and mushroom (I added a bit of mayo on top of this as well!), then top with another rice patty. Wrap in aluminum foil if desired.


Read more...

Goma Dofu - Sesame Tofu

>> Tuesday, January 4, 2011


I'm still living in 2010 at the moment in my head.

Because I haven't the chance to think about New Year's resolutions yet.

And I haven't passed on my greetings and best wishes to you.

So I'm doing it now. Passing on my greetings I mean. Resolutions don't necessarily have to start in January in my book.

So I hope your holiday season was very nice.

And that you got to be with the ones you love to plant kisses on and share food with...

And that you thought about the meaning of Christmas....

And if you were going through a rough time, I hope you found hope and consolation in the midst of it all.

Thank you for your readership and encouraging comments over the past year. You've made this journey so much more fun than a while ago when I used to begin my posts with 'Dear void'. Thanks for turning that void into friends. Or virtual friends.


So I was home for the holidays and was joyfully stuffed with Chinese food - crispy duck, shallot pancakes, stir fried noodles, dumplings, and everything else drool-worthy. Not your typical Christmas-type food. We also dined out almost everyday and that's the way it has been all my life - Christmas is celebrated with Chinese food usually not prepared at home. It's a tradition!


This post is rather special to me because because this goma dofu (sesame 'tofu' - not really tofu) has been planned for a long time now. Why so long, you ask? Ever since I saw this post on JustHungry, I knew straight away that I needed to make this - sesame tofu is one of my favourites to order in Japanese restaurants, but they're usually in fried form like agedashi tofu. I love the intense sesame flavour (from tahini) and the smooth tofu-like texture of this dish!

However, the problem I had was sourcing pure kuzu powder. The ones at the Japanese stores are usually sweet potato starch and arrowroot, which would not work according to the recipe. So for the past few months, I've scoured every Asian or Japanese grocery store I came across with no luck. 

Until last month Mother went to Japan and bought some for me. 

Probably the best Christmas present ever.

I hope you can find kuzu powder easier than I have and give this a go. Oh, and do you know that kuzu has a lot of health benefits and is also used as a hangover remedy in China as it detoxifies the liver? You learn something new everyday, huh?

This dish is eaten cold, with a dash of soy sauce (as the tofu itself is bland) and wasabi (which I didn't have).

Enjoy.

(p.s. I used the rest of the kuzu powder to make kuzumochi - sticky mochi cake. One of the yummiest Japanese summertime dessert!)
Goma Dofu (Sesame Tofu)
Serves 4
  • 70g (2.5 oz) tahini or nerigoma that has been stirred very well
  • 50 g (1.75 oz) kuzu powder
  • 500ml (2 cups plus a tablespoon) water, filtered water preferred
  • Equipment needed: bowl, pan, square container to mold the goma dofu
1. Combine the kuzu powder with a little water to make a paste. Add the rest of the water and mix well.

2. Put into a pan over medium heat, and add the tahini or nerigoma. Mix continuously, smooshing any lumps of sesame paste and incorporating it as well as possible into the liquid. When it heats up it will start to thicken and get a bit lumpy - keep stirring to smooth out the lumps. After a while, it will turn from milky to a bit more translucent in color and have the consistency of a thick pudding.
3. Wet the inside of the square container you’ll use as the mold. Pour in the hot pudding-like mixture and smooth out the top. Bang the container a few times onto a countertop or table to get rid of bubbles. Let cool to room temperature, and then put into the refrigerator to cool, about 2 hours.

4. Unmold and cut into squares. Serve chilled, with wasabi or grated fresh ginger and soy sauce. (The goma dofu on its own is quite bland, so it does need the sauce.) It’s really nice as a cold appetizer on a warm day. It can be stored, well covered, in the refrigerator for a couple of days.

Happy New Year.

It's 2011. I'm here and I'm present. And hope you are too!

Read more...

Roasted Dutch Carrots with Balsamic Vinegar and Honey

>> Monday, December 20, 2010


One of my favourite activities during the week is grocery shopping. Or more precisely, shopping at the food markets with my fashionable granny trolley (which was on my Christmas wishlist but I couldn't wait and got it myself a few weeks ago!)

Apart from the obvious pleasures of smelling/touching/purchasing the freshest produce and seeing all the seasonal items in abundance - I enjoy observing how people around me go about this activity and seeing their different purchasing patterns.


I also love to listening on to people's conversations at the markets (yes, I eavesdrop while I shop!). Like the time I was picking carrots, a man next to me asked his young son,

"Do you know what these are called?" 
"Errr...purple carrots?"
"No, these are called heirloom carrots, ok?"

Good on ya, dad! I adore conversations like this. 

Teaching kids that carrots don't come in a packet off the supermarket shelf. 


Then just a few days ago, I was picking some corns and this young boy came up next to me and asked,

"So, what do you look for in a corn? How do you know if it's any good?"

I taught him to pick ones which are bright and plump. Then he proceeded to have a conversation with me which rocked me socks off. With such genuine enthusiasm, he talked about how awesome that the blackberries in his basket are and how cheap they are now. Maybe it's because I don't have any kids myself yet, but it feels rather strange to be talking to a young kid as if you are talking to a grown-up.


Anyways, so this is the first time I have purchased those dutch carrots! December has a way of making you do things you normally wouldn't do. And plus I couldn't take my eyes off these when I saw them all vibrant and joyful, almost singing out to me.

These are so sweet and simply delicious - I'm sure they'd make a great side to any meaty Christmas dishes!

I wish your Monday was very nice and you keep safe during this festive time... 


Ingredients

  • 1 bunch Dutch carrots
  • 30 ml  olive oil
  • 3-4 clove garlic, crushed
  • 1 tbsp honey
  • Splash of balsamic vinegar
  • salt and pepper to taste
  • Few sprigs of dills (although I would recommend using thyme since dill don't really quite work as well as thyme - just what I had in the fridge).

1. Preheat the oven to 220C.
2. Trim carrot tops and wash carrots well.
3. Place carrots in medium baking dish with combined oil, garlic and honey and balsamic vinegar; toss well. Sprinkle salt and pepper.
4. Roast, uncovered, 15 minutes.
5. Add thyme leaves, roast further 3 minutes or until tender.

Read more...

Black Sesame Agar Agar + winners of Baker's Delight challenge

>> Thursday, December 16, 2010

[Scroll to the bottom of the post to see if you're the winner of the Baker's Delight Challenge!]

This week I am learning to surrender

The relinquishment of one's own will, says wiki. 

What exactly am I surrendering? Well, a dream of mine. Although small - it does mean something to me. A dream that is almost within an arm's reach.

But circumstances change in our lives, and most of the time with little notice. So you try to be mature about it. You wrestle with the decisions in your head over and over. Then you step back. If you don't let go your hold on it, how can you know what else God has planned for you?

So here I am.  I am trying to be patient and I am waiting. I am also a bit scared of the unknown. 

Thankfully the thought that this joyous time of the year is upon us (9 more sleeps 'til Christmas - I kid you not!) just makes everything a little better. The sun came out for me this morning... Did that 'mean' person from work just smiled at me? Oh why, doesn't my hair look fashionably messy today? And how could I have made this black sesame agar agar look rather...well, presentable? ;)

Truth be told, I haven't been able to do any Christmas cooking/baking! But I have definitely enjoyed reading soo many wonderful posts from all over the world. This agar agar was made just because I happened to have the ingredients available. It may look like black sesame panna cotta, but the texture is completely different! Do not expect some smooth, velvety kind of pudding. The agar agar makes it rather 'chewable' if you know what I mean. It's almost like eating a banana that's black sesame flavoured. That sounds weird, doesn't it? But if you're a black sesame fan like I am, you'll be addicted and have one after another....

Black Sesame Agar Agar
Makes around 4
  • 3 tbsp sweetened black sesame paste (I used 3 tbsp of black sesame powder instead)
  • ~2 tbsp sugar (omit this if you're using the paste. Adjust the sugar according to your personal taste.)
  • 100ml cream
  • 400ml milk
  • 1 tsp agar agar powder
  • (optional) - whipping cream
  • (optional) - brown sugar syrup
1. In a bowl, add in the sesame paste and slowly pour in the cream and mix until combined. If using black sesame powder as I did, combine with the sugar first before blending in with the cream.

2. In a pot, add the milk and agar agar powder. Let sit for a few minutes and begin heating it up on a stove on low/medium heat until it boils. Take the pot off the stove.

3. Pour the black sesame cream paste from step 1 into the pot with the hot milk and mix to combine.

4. Let the pot sit in a bath of ice cold water and to cool down before pouring into the pudding molds.  Place into the fridge until set.

5. To serve - whip up some cream and pour some brown sugar syrup over the top.

~*~*~*~*~*~*~*~*~*~*~*~*~*~*~*~*~*~*~*~*~*~*~*~*~*~*~*~*~*

Baker's Delight Challenge Winners!

Sorry for the long wait - but here are the randomly picked winners of the Baker's Delight challenge:

grub
Duong
Angela
deb
LimeCake

Congrats people! I will be sending you an e-mail soon.

Angela - I do not have your details so you will have to shoot me an e-mail!

~*~*~*~*~*~*~*~*~*~*~*~*~*~*~*~*~*~*~*~*~*~*~*~*~*~*~*~*~*

Read more...

Banana Mango Cake

>> Tuesday, December 7, 2010

I am going to be trite here and say something you have heard a million times recently:

I can't believe it's almost Christmas! And I can't believe another year has gone by!

What an eventful revolution around the sun it has been - so many changes, laughter, tears, joy, personal growth (which I wish there were more of!) and blessings. Another year of God's faithfulness.

What have I been up to apart from humming Disney songs (thanks to all those people who changed their facebook profile to Disney characters!) and eating buttered corns?


Well, I've signed up for this website which requires me to fill in my personal information like what I do in my spare time and what my daily routine is like. I wrote about which type of people I am compatible and can get along with. Things I can't stand in a person. You get the picture. I am trying to be 'matched' and connected with the people in this city.

I mean to me, this seems like the last resort. Especially if you are a bit desperate and just can't find 'the one'?  So, today I met up with a potential 'match' after work. I went over to the that person's place actually. 

Whoa, you're thinking...aren't you moving a little bit too fast Viv?!

Friends, I don't know what you're thinking, but I am looking for a flatmate/roommate of course! I'm sorry, I didn't mean to lead you on. To think that this is some juicy post. But I just couldn't stop chuckling to myself when I was filling out the flatmate finder form. This is just a bit funny to me.

But yes, I am moving. Again. It's hard. It's tiring. It's oh-very-exciting. The house I saw tonight wasn't the one unfortunately. It was nice and warm. But it needs to work on its hygiene a little bit to be considered a contender. 

Let's hope the next few ones I see will be good! I'm dreaming about a light filled kitchen with some mango trees in the backyard.


Just because, I love mangoes. 

When life don't give you enough bananas, you can just use mangoes. Truly.

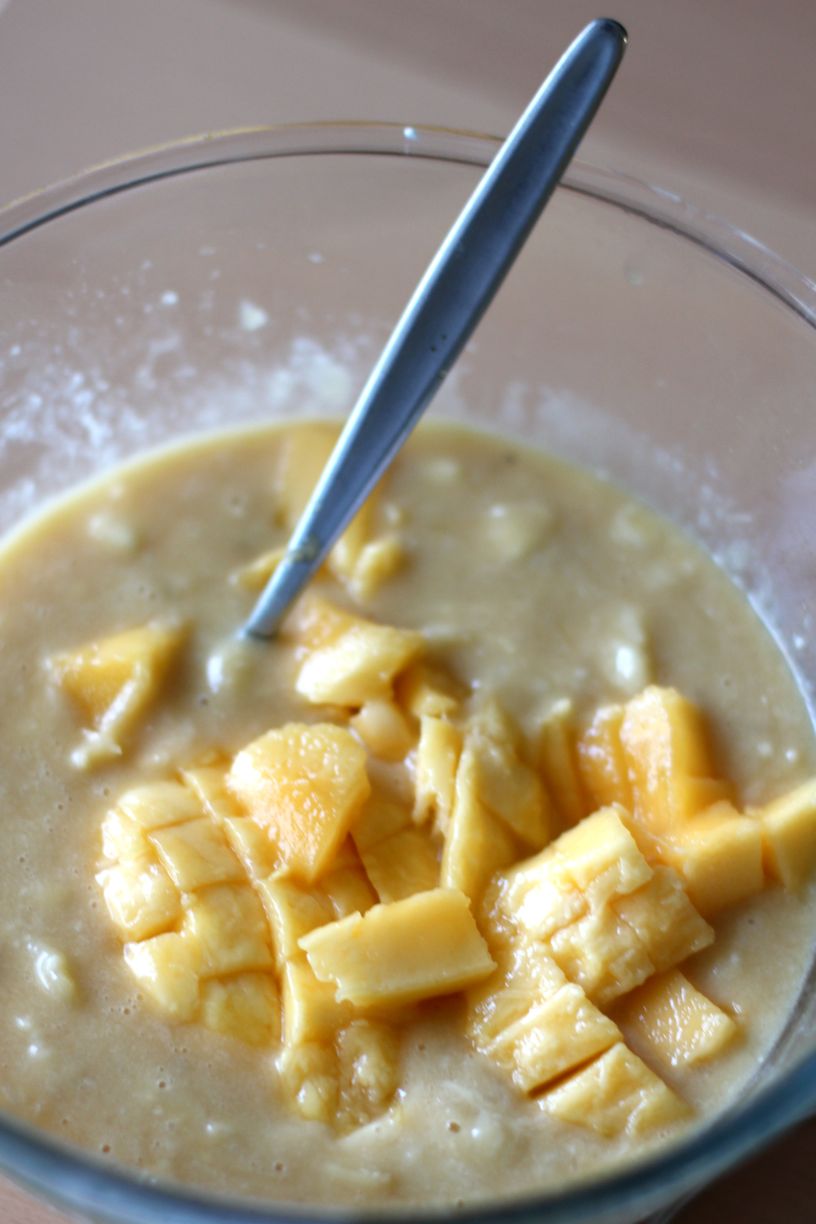
I was having a dilemma when I was making my usual banana cake weeks ago, only to find at the last minute that one banana was missing!  Calm down. Quick, think of your feet! What do I have. Mangoes! Now, where have I heard about mango bread before? Thanks Deb! I remember she said that mango bread is the Hawaiian's answer to our banana bread!

I used my usual banana bread recipe and just substituted a banana for 1 small mango. I also added in some nutmeg and cinnamon.


The verdict? This is like eating the most fragrant piece of cake ever. When I took a bite, I was thinking, 'This tastes sooo pretty'. Weird I know. But the mango and nutmeg add much 'perfume' to this banana bread that I can just imagine having this with a cup tea with my future potential flatmates in our mango-tree filled backyard.

Banana Mango Cake
Inspired by How to be a Domestic Goddess
  • 175g plain flour
  • 2 teaspoons baking powder
  • 1/2 teaspoon bicarbonate of soda
  • 1/2 teaspoon salt
  • 50g unsalted butter, melted
  • 50ml grapeseed oil (or similar neutral cooking oil)
  • 1/4 cup yoghurt (I used greek yoghurt)
  • 150g sugar
  • 2 large eggs
  • 3 small, very ripe bananas (about 300g weighed without skin), mashed
  • 1 medium sized mango (Updated 8/12/2010: it's Mango not Banana - sorry for the typo!)
  • (optional) a handful of chopped pecans (just because I found them in the pantry)
  • 1 teaspoon vanilla extract
  • 1/2 tsp ground nutmeg
  • 1/2 tsp cinnamon
1. Preheat the oven to 170ºC/gas mark 3 and get started on the rest.

2. Put the flour, baking powder, bicarb and salt in a medium-sized bowl and, using your hands or a wooden spoon, combine well.

3. In a large bowl, mix the melted butter, grapeseed oil, yoghurt and sugar and beat until blended. Beat in the eggs one at a time, then the mashed bananas and mangoes (cut into small cubes)

4. Then, with your wooden spoon, stir in the pecans (optional) and vanilla extract. Add the flour mixture, a third at a time, stirring well after each bit.

5. Scrape into the loaf tin and bake in the middle of the oven for 1-1 1/4 hours. When it's ready, an inserted toothpick or fine skewer should come out cleanish.

6. Leave in the tin on a rack to cool, and eat thickly or thinly sliced, as you prefer.

Read more...

Curry Seafood Bruschetta

>> Wednesday, December 1, 2010

Remember the time when I used up half a French baguette from Baker's Delight and stuffed it with prawn and cream cheese (and ate it all by myself because I had no one to share it with?)

I thought it's about time that I post about the other half...it's fearful symmetry! (A terribly poetic usage, I know.)
And also to remind you that there are only a few days left for the Baker's Delight challenge - a chance for you to win a voucher to sample some of their new artisan range - just leave a comment on that post for your chance to win! :D 

Seafood curry is a first for me. And it made my kitchen smell crazy delicious that I'm pretty sure the neighbours were standing outside my door sniffing through the cracks. Scary (imaginary) neighbours.  The baguette is toasted to perfect crunchiness and the rich seafood and melting cheese that goes on top of it makes it the perfect snack anytime during the day.
Curry Seafood Bruschetta
  • 1/2 French baguette
  • 80-100g mixed seafood (fresh or frozen - I used fresh from the local seafood shop)
  • 2 cloves garlic, minced
  • 1-2 tbsp olive oil 
  • 1 tsp curry powder
  • 3 tbsp milk
  • 2 tbsp cream
  • salt and pepper to taste
  • 50g cheese (I used mozarella)
  • handful of herbs (like parsley)
Preheat oven to 200C.

1. Put a pan over medium heat and once hot, add the olive oil and garlic. Stir until fragrant and slightly golden. 

2. Defrost the mixed seafood if necessary and add to the pan along with the herbs.
3. Once cooked/heated up, add the curry powder and stir around the pan until combined.
4. Add the milk and cream - let it cook for a few minutes and add the salt and pepper. 

5. Slice the baguette into around 2cm thick slices. Using a small knife, make a cut (lightly) around the centre of the slice and press down on it to create a cavity (to hold more toppings!).
6. Put the seafood mixture into the cavity of the baguette and put the cheese on top of each.
7. Back at 200C until the cheese melts (roughly 5-10 minutes - keep an eye out to make sure that sides of the baguette doesn't burn.)

Read more...

Japanese Sweet Potato Cake

>> Saturday, November 20, 2010


(Some of the rather random) Things I love about Mother:
 
1. She taught me that money doesn't fall from trees
By paying me 20 cents for every hour of my massage services back in the days.
 
2. She also taught me patience and understanding
By telling me why I shouldn't sulk when I was the last to get picked up from school.
 
3. She is willing to sacrifice her time on me
By sitting through hours and hours of my squeaky violin and horrific piano playing. I don't know how she did it. No wonder she had headaches often.
 
4. She defies some Asian mother stereotype
By always saying...
"Viv, if you keep on studying, I'm going to be very angry. Go to sleep" (*switches off light*)
"Oh, you're home already from the party? So early?"
(Maybe there was some reverse psychology in play there).

 
5. She pushes me to do things I don't want to do
By giving me a Chinese Bible and telling me write out everything in it during my summer holiday. (No, I never made it through to the end though).
 
6. She ignited my passion for numbers
I don't know where she got stacks of mathematical worksheets from but I used to spend hours a day doing endless equations and ended up falling in love with maths.
 
7. She is an extremely generous person and unpretentious.
You'd agree if you know her.

8. She doesn't get mad easily
Not once did she tell me off when I let my mouse Flynn poop everywhere and my rabbit Gloria eat through our set of encyclopedia. Or when I decided to keep flies and spiders as pets. I'd totally freak if my own kids do that. 

9. She taught me the basic skills in the kitchen
For as long as I can remember, I had always stood next to her washing and chopping at her every commands.
 
10. She is the #1 fan of this blog yet she will deny it if you ask her.


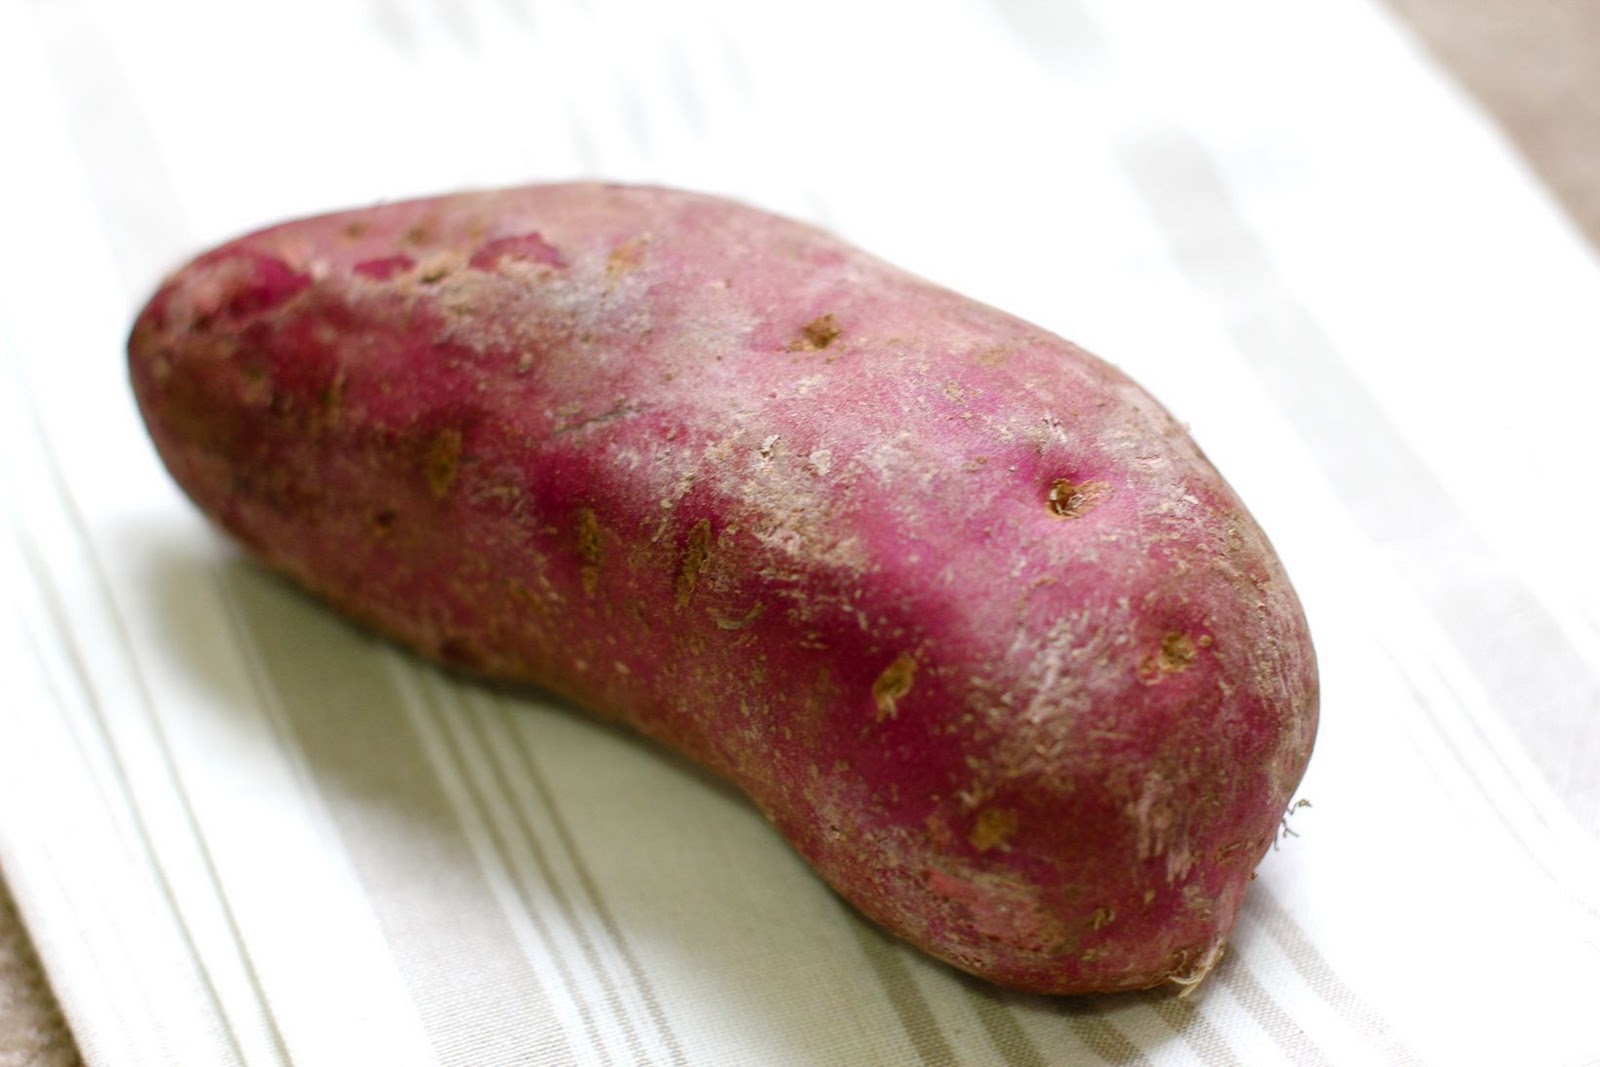
I hesitated about sharing this post because the photos are awkward and rushed. But I must, because today is Mother's birthday and her ultimate favourite food is sweet potatoes. Japanese sweet potatoes to be precise. And since she's not here with me, all I can do is bake her favourite cake and tell her how deliciously simple this cake is while I eat it in front of her on Skype. And that every bite of this cake is like a mouthful of super silky smooth sweet potato which can only make every sweet potato fan deliriously happy.

Happy birthday Mother. I heart you so much.


Japanese Sweet Potato Cake
Adapted from Masa

  • 300g sweet potato (with purple skin)
  • 160ml milk or cream (I used milk)
  • 40g sugar (I used brown)
  • 2 eggs
  • 30g all purpose flour
  • cake tin (15-18cm)

Preheat the oven to 170C.

1. Butter the baking tin and dust with flour. Remove excess.

2. Steam the sweet potato until cooked, and remove the skin.

3. Put the sweet potato in a blender and mix until smooth (I don't have a blender so used a potato masher!)

4. Place the sweet potato puree in a bowl and add the milk or cream, mix together.

5. Add sugar into the mixture then the eggs. Combine well with a whisk.

6. Add the sieved flour and mix until the batter is smooth. Pour the batter into the cake tin.

7. Bake the cake for around 40-50 minutes at 170C. At around the 40 minutes mark, check if it is cooked by inserting a chopstick/stick into the cake and if the stick comes out clean, it is cooked. Otherwise, leave it in the oven longer.

8. Once out of the oven, leave on the tray and wait until cool. Better yet, put it in the fridge after it has cooled down to further set.

Note: Remember not to eat straight away (as hard as it is!) as it is easier to cut into the cake once it has cooled down and set, as there are very little flour in the cake.

Read more...
Related Posts with Thumbnails

  © Blogger template Simple n' Sweet by Ourblogtemplates.com 2009

Back to TOP