Japanese Sweet Potato Cake

>> Saturday, November 20, 2010


(Some of the rather random) Things I love about Mother:
 
1. She taught me that money doesn't fall from trees
By paying me 20 cents for every hour of my massage services back in the days.
 
2. She also taught me patience and understanding
By telling me why I shouldn't sulk when I was the last to get picked up from school.
 
3. She is willing to sacrifice her time on me
By sitting through hours and hours of my squeaky violin and horrific piano playing. I don't know how she did it. No wonder she had headaches often.
 
4. She defies some Asian mother stereotype
By always saying...
"Viv, if you keep on studying, I'm going to be very angry. Go to sleep" (*switches off light*)
"Oh, you're home already from the party? So early?"
(Maybe there was some reverse psychology in play there).

 
5. She pushes me to do things I don't want to do
By giving me a Chinese Bible and telling me write out everything in it during my summer holiday. (No, I never made it through to the end though).
 
6. She ignited my passion for numbers
I don't know where she got stacks of mathematical worksheets from but I used to spend hours a day doing endless equations and ended up falling in love with maths.
 
7. She is an extremely generous person and unpretentious.
You'd agree if you know her.

8. She doesn't get mad easily
Not once did she tell me off when I let my mouse Flynn poop everywhere and my rabbit Gloria eat through our set of encyclopedia. Or when I decided to keep flies and spiders as pets. I'd totally freak if my own kids do that. 

9. She taught me the basic skills in the kitchen
For as long as I can remember, I had always stood next to her washing and chopping at her every commands.
 
10. She is the #1 fan of this blog yet she will deny it if you ask her.


I hesitated about sharing this post because the photos are awkward and rushed. But I must, because today is Mother's birthday and her ultimate favourite food is sweet potatoes. Japanese sweet potatoes to be precise. And since she's not here with me, all I can do is bake her favourite cake and tell her how deliciously simple this cake is while I eat it in front of her on Skype. And that every bite of this cake is like a mouthful of super silky smooth sweet potato which can only make every sweet potato fan deliriously happy.

Happy birthday Mother. I heart you so much.


Japanese Sweet Potato Cake
Adapted from Masa

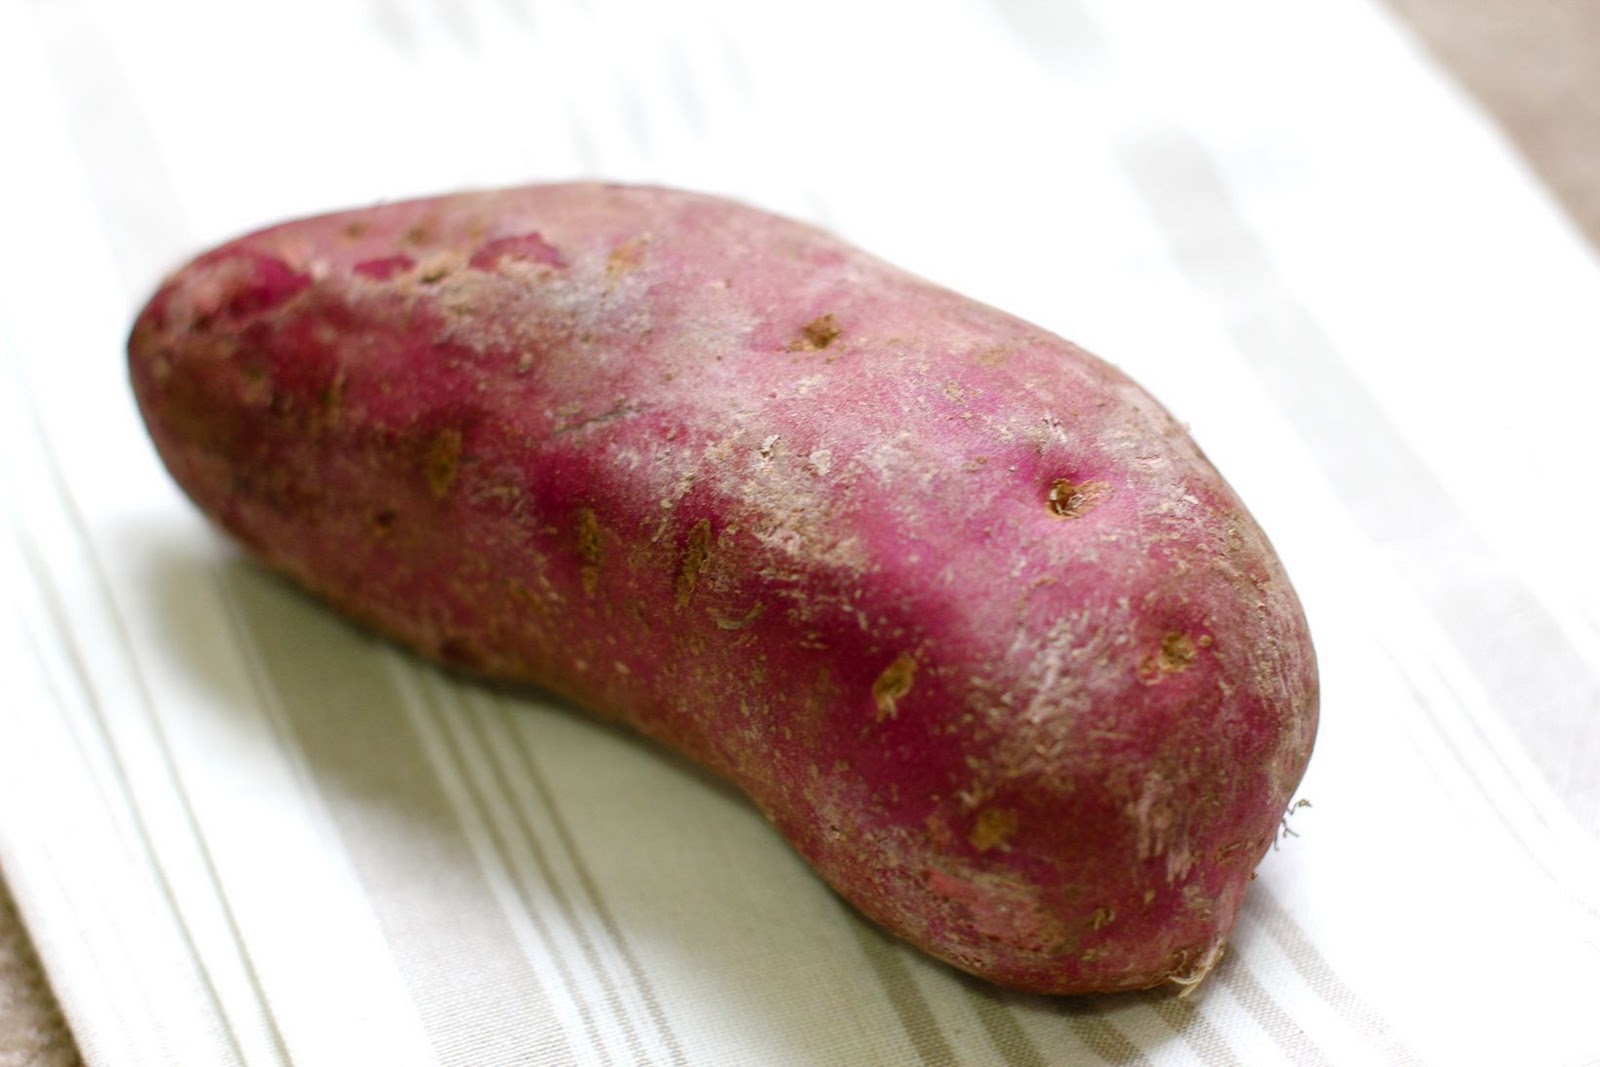
  • 300g sweet potato (with purple skin)
  • 160ml milk or cream (I used milk)
  • 40g sugar (I used brown)
  • 2 eggs
  • 30g all purpose flour
  • cake tin (15-18cm)

Preheat the oven to 170C.

1. Butter the baking tin and dust with flour. Remove excess.

2. Steam the sweet potato until cooked, and remove the skin.

3. Put the sweet potato in a blender and mix until smooth (I don't have a blender so used a potato masher!)

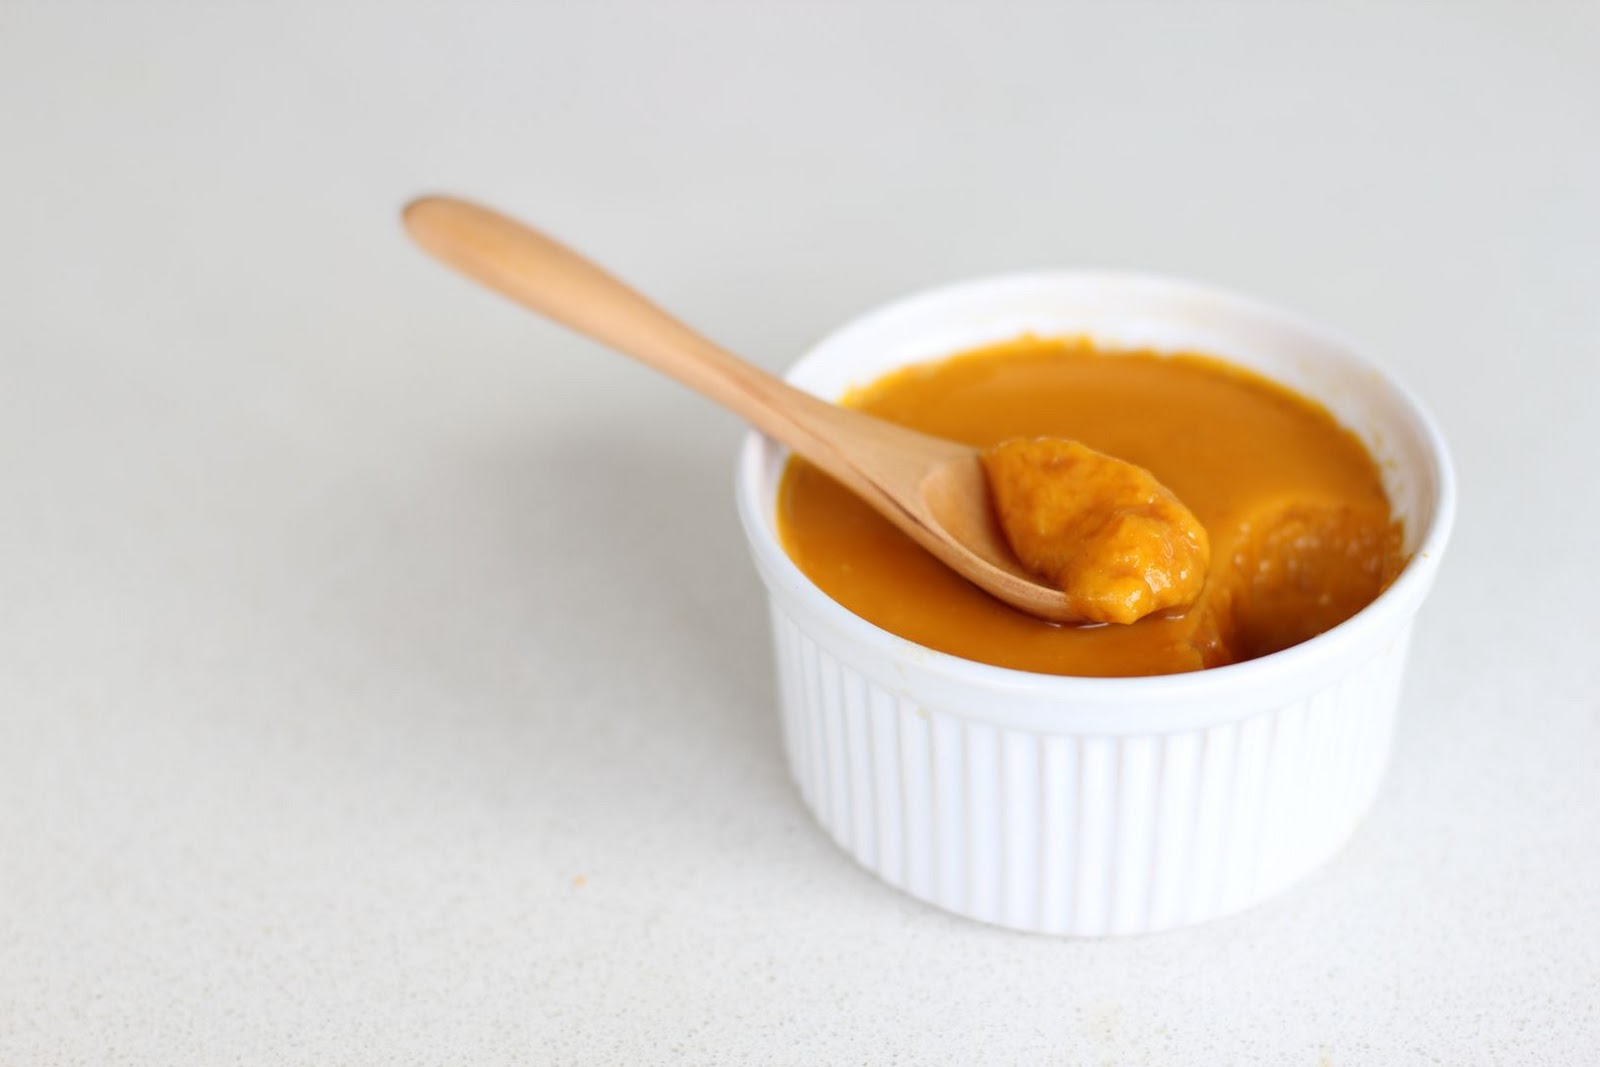
4. Place the sweet potato puree in a bowl and add the milk or cream, mix together.

5. Add sugar into the mixture then the eggs. Combine well with a whisk.

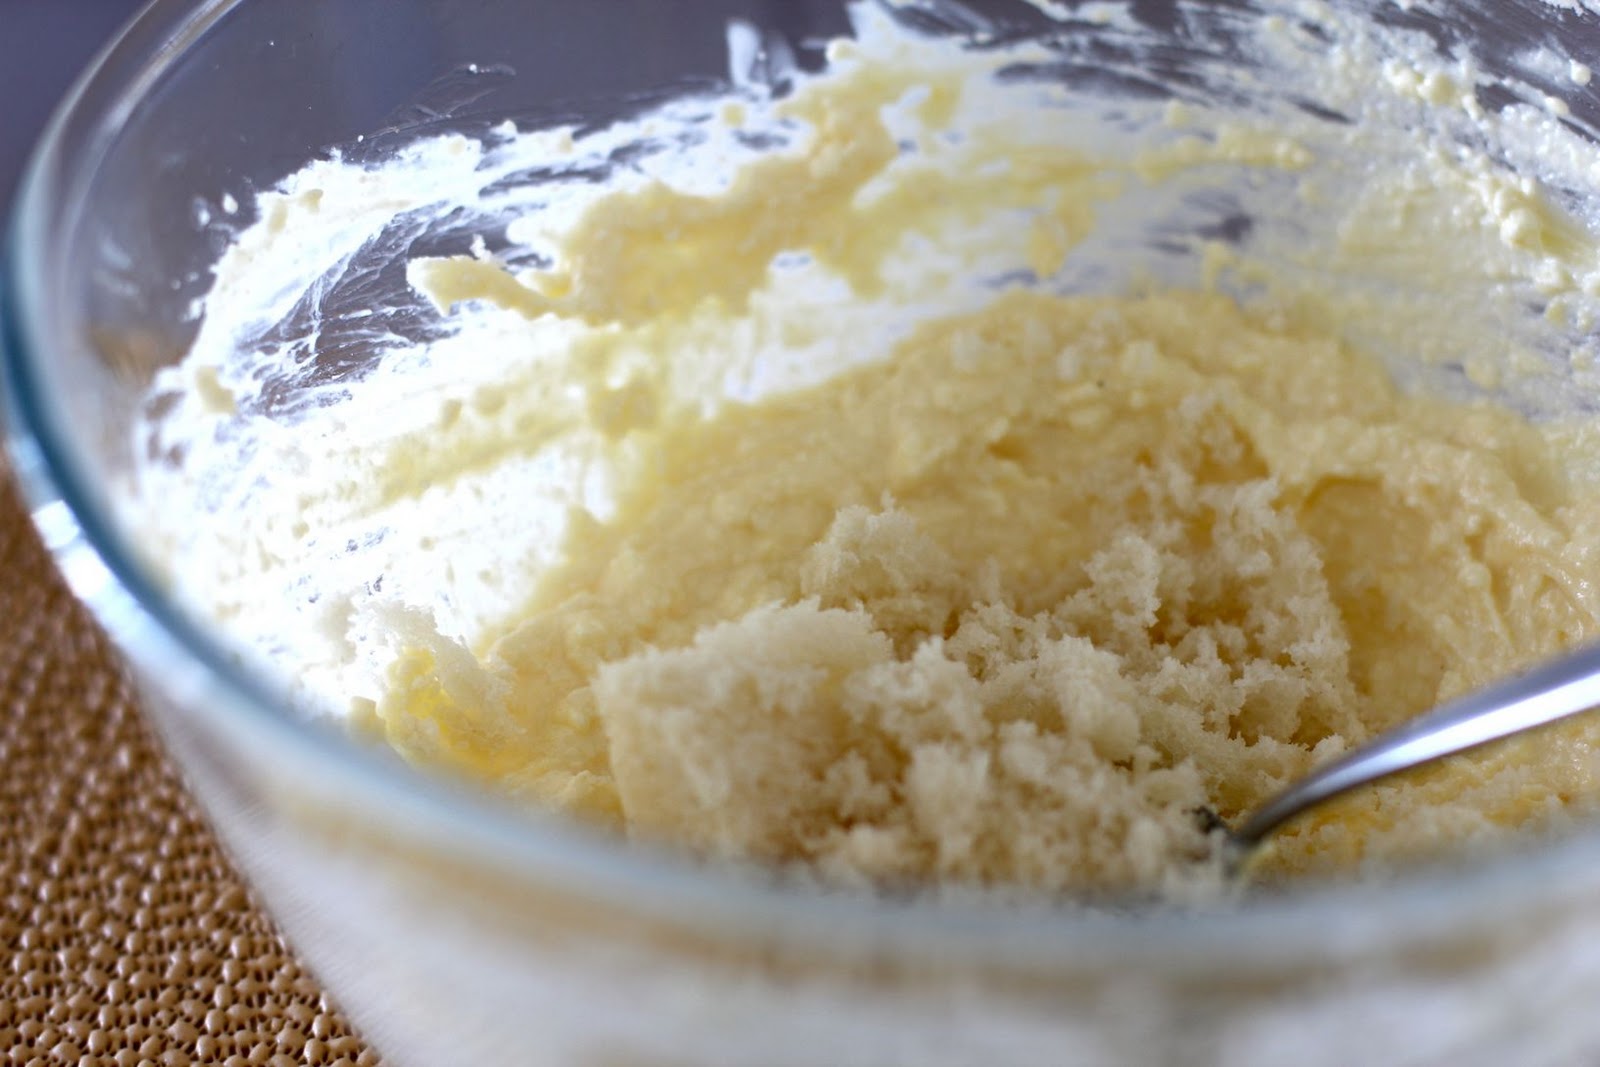
6. Add the sieved flour and mix until the batter is smooth. Pour the batter into the cake tin.

7. Bake the cake for around 40-50 minutes at 170C. At around the 40 minutes mark, check if it is cooked by inserting a chopstick/stick into the cake and if the stick comes out clean, it is cooked. Otherwise, leave it in the oven longer.

8. Once out of the oven, leave on the tray and wait until cool. Better yet, put it in the fridge after it has cooled down to further set.

Note: Remember not to eat straight away (as hard as it is!) as it is easier to cut into the cake once it has cooled down and set, as there are very little flour in the cake.

Read more...

Peanut Butter, Nutella and Jam Popsicles

>> Thursday, November 18, 2010


We all know that novelty wears off...

But there are a few exceptions, such as watching the sunset (surely I've seen a number of sunsets in my lifetime, but I still oooh-and-aaah everytime without fail), rainbows after the rain, playing with a giggling baby, listening to your favourite song on iPod and for me personally...

All day breakfast.

When I do find myself in a cafe that serves all day breakfast, my heart skips a beat. Ok, maybe not quite...but there is definitely something about having breakfast at 3pm that makes me feel giddy inside. Oh, you too? Good.


Because these popsicles may have that effect on you as well. They are made with your breakfast spreads and once you start making them, you might find yourself needing to restock your spreads more often than you'd like. You may also find yourself heading straight to the freezer after work. Nibbling on one while you cook. And another one after dinner. And so yes, they are addictive and would definitely classify as 'all day breakfast'.

In keeping with the 'breakfast' theme, I added greek yoghurt as the base. I don't think I can pour cream into these and call them breakfast. It's not my kind of thing. And the best part is, they taste great with the yoghurt!


I used crunchy peanut butter for this, but you can use the smooth version if you prefer. I love the crunchiness so much that I bought some raw hazelnuts, crushed them, and added them to the tip of the nutella popsicles!

These mini popsicle makers are from IKEA for a couple of bucks (and I finally bought 1kg of frozen meatballs too!). They're to me, the next best thing after an ice-cream maker (especially if you don't have one like myself!)

I hope you do give this a go! The peanut butter one is seriously good (if you're a PB fan like myself).

Crunchy Peanut Butter Popsicle
Makes 3 mini popsicles
  • 2 generous tbsp crunchy peanut butter
  • 1 tbsp condense milk (adjust to your preference)
  • ~1/2 cup greek yoghurt (I used Black Swan)
  • ~ 3 tbsp milk
1. Mix the peanut butter in a bowl with condense milk until combined. 

2. Pour in the yoghurt and continue mixing with a spoon until smooth.

3. Add the milk (decrease or increase the amount of milk depending on the size of your popsicle makers) and once again mix until smooth before pouring them into the popsicle molds. The mix should not be too runny.

4. Freeze overnight.

Crunchy Nutella Popsicle
Makes 3 mini popsicles
  • 2 generous tbsp Nutella
  • handful of hazelnuts, crushed
  • ~1/2 cup greek yoghurt
  • ~ 3 tbsp milk
1. Mix the nutella spread in a bowl and with the yoghurt and mix with a spoon until smooth.

2. Add the milk (decrease or increase the amount of milk depending on the size of your popsicle makers) and once again mix until smooth.

3. Take out a small portion of the mix (a few tbsp) and combine with the crushed hazelnut. Pour a small amount into each of the molds for the tip of the popsicles.

4.  Pour the rest of the mix into the popsicle molds.

5. Freeze overnight.

Blueberry Yoghurt Popsicle
Makes 3 mini popsicles
  • 2 generous tbsp jam of choice (I prefer the ones with chunky fruit pieces)
  • 1 tbsp honey
  • ~1/2 cup greek yoghurt
  • ~ 3 tbsp milk
1. Mix the jam in a bowl with the honey and until combined. 

2. Pour in the yoghurt and continue mixing with a spoon until smooth.

3. Add the milk (decrease or increase the amount of milk depending on the size of your popsicle makers) and once again mix until smooth before pouring them into the popsicle molds.

4. Freeze overnight.

Blueberry yoghurt popsicle (and s'cuse the terrible photo!)

Read more...

Black Sesame Steamed Cupcake

>> Saturday, November 13, 2010


It's one of those weekends you wake up to the sounds of the rain and traffic. You try hard to re-enter the world of dreams but alas, your mind is filled with messy and scrambled thoughts - like a fuzzy TV with bad reception.

So you start making plans for this precious day.

Will it be a day of chores *gasps*? Or a day in the cafe (specifically St. Ali in South Melbourne) with a favourite book? How about taking the new granny trolley out for a test drive at the food market? Or hop on those tourist bus and explore this new city?

No doubt the decision will set the pace for the whole day....


I wrapped myself up in a blanket and head out to the kitchen to put some water in the kettle. From the window, the wet concrete road seems to be to drying up. It was this moment I caught myself with a selfish thought - I wanted it to pour outside. I want a downpour to be precise. I would like to be stuck at home with a reason like that - and to cook hot chocolate over the stovetop and to make ginger snaps with molasses and watch black and white movies.

But I have no molasses nor ginger!

So I get out a bowl and started whisking together the flour, egg, milk...and ground black sesame powder. I miss this steamed cupcake recipe that I used to make.


I also found some left over sweet red-beans in the fridge and decided that perhaps, they'd make a good match with the black sesame. And they did!

Within 20 minutes, I had several steamed goodies in front of me. Right this moment, everything seems to be falling into place. The piping hot steamed cakes were soft like bread, full of strong black sesame flavours and just plain simple. And sometimes, isn't it usually the simple things in our daily lives that cause us to pause - and feel content and grateful for the moment?

All of a sudden -  I didn't want it to rain anymore. No hot chocolate, thank you.

Quickly pulled my favourite jumper over my head. Rain or shine, Melbourne - here I come!


Steamed Black Sesame Cupcakes
Makes 6 cupcakes
  • 1 large egg
  • 30g sugar (I used brown)
  • 1/4 cup of milk (or yoghurt)
  • 1 tablespoon grapeseed oil (can use other oil like canola or olive)
  • 60g flour
  • 50g cooked/sweetened red beans (optional)
  • 20g black sesame powder (you can get it from most Asian grocery stores)
  • 1 teaspoon baking powder
1. In a bowl, beat the egg lightly then add the sugar and mix well.

2. Then add the milk into the mixture as well as the grapeseed oil. Beat well.

3. Sieve the flour, and baking powder then combine with the black sesame powder. Incorporate into the egg mixture and mix well.

4. Finally incorporate the red-bean into batter and mix gently (or you can keep the red bean separate from the batter and ladle it in between the batter as I did)

5. Ladle the batter into 6 separate cupcake/panna cotta containers which are lined with cupcake liners/muffin cups.

6. In a large pot (or cast iron casseroles), fill it with enough boiling hot water such that when you put the cupcakes in, the water comes about half way on the mould. Steam for around 13-15 minutes with the lid on. I prefer to wrap a cloth/towel on the lid to prevent water droplets dropping onto the cupcakes.

7. Carefully remove from pot as they cupcakes will be steaming hot!

Read more...

Chocolate Banana Cake + Pumpkin Pudding with Cinnamon sauce

>> Thursday, November 11, 2010


Life doesn't always turn out the way you plan (and I'm glad that is so!)

Because if that was the case, I'd be an airline stewardess now (perhaps en route to Paris right this moment?)

That was the plan at age five. You see, I met this stewardess on the plane and she was the nicest person in my young eyes.

No one had ever bent down to my height, looked me in the eyes and with sweetest smile said to me those 5 magic words...would you like some candies?

I thought she was an angel! (Obviously Mother never taught me about staying away from strangers with candies.)

Since then I've gone through many strange phases and never would I have ever imagined back then that I'd be doing what I am doing now. Never.


Anyways this amazing cake.... You are not meant to be seeing this chocolate banana cake on the screen right now. But it just happened.

This was meant to be a simple banana loaf...something that's very close to my heart. And something I had planned to bake to celebrate my new life in the new kitchen. The very first baked item chez moi in Melbourne.

But half way through the recipe 2 things happened:

#1 I realised I do not have a loaf pan. Only a cake tin.

#2 I couldn't stop thinking about the cocoa powder and dark chocolate chips from Koko Black I had purchased the previous day.

So this cake here happened as a result.

Even though this is a recipe for a loaf, but it worked out beautifully as a cake - moist, simple, and so satisfying at 11pm on a weeknight. I was worried about the chocolate over-powering the bananas but the flavours turned out quite balanced (even though the chocolate is still on a stronger side.)

Chocolate Banana Cake
Inspired by How to be a Domestic Goddess
Makes 8-10 slice
  • 150g plain flour
  • 25g cocoa powder
  • 2 teaspoons baking powder
  • 1/2 teaspoon bicarbonate of soda
  • 1/2 teaspoon salt
  • 50g unsalted butter, melted
  • 50ml grapeseed oil (or similar neutral cooking oil)
  • 1/4 cup yoghurt (I used greek yoghurt)
  • 150g sugar
  • 2 large eggs
  • 4 small, very ripe bananas (about 300g weighed without skin), mashed
  • 100g dark chocolate chips
  • 1 teaspoon vanilla extract
1. Preheat the oven to 170ºC/gas mark 3 and get started on the rest.

2. Put the flour, cocoa powder, baking powder, bicarb and salt in a medium-sized bowl and, using your hands or a wooden spoon, combine well.

3. In a large bowl, mix the melted butter, grapeseed oil, yoghurt and sugar and beat until blended. Beat in the eggs one at a time, then the mashed bananas.


4. Then, with your wooden spoon, stir in the chocolate chips and vanilla extract. Add the flour mixture, a third at a time, stirring well after each bit.

5. Scrape into the loaf tin and bake in the middle of the oven for 1-1 1/4 hours. When it's ready, an inserted toothpick or fine skewer should come out cleanish.


6. Leave in the tin on a rack to cool, and eat thickly or thinly sliced, as you prefer.

I should have been patient and bake this for another 15 minutes...you can see the bottom is still a bit on the gooey side.

Oh, and remember the pumpkin pudding recipe I promised a few posts back?

Sorry for the delay...but better late than never right? I hope you make this and enjoy it as much as I did. Puddings are great...I reckon the saying should be 'a pudding a day'. Not 'an apple a day'.


Pumpkin pudding with Cinnamon Sauce
  • 300g Pumpkin
  • 40g Sugar
  • 1 cup Milk
  • 1/2 cup Water
  • 5g Gelatine powder
Sauce
  • 1 stick cinnamon
  • 2-3 tbsp brown sugar
  • ~1 cup water
1. Soak the gelatine powder in 25mL of water until softened.

2. Remove the skin from the pumpkin and chop into bite-size.

3. In a pot over the stove, add water, milk, sugar and pumpkins. Cook until the pumpkins are soft.

4. Use a processor or blender, blend the pumpkin mixture until smooth.

5. Once the blended mixture is slightly cooled down, add the gelatine from step 1 above and combine until it is dissolved into the mixture.

6. Ladle the mixture into ramekins or pudding moulds and keep in fridge for at least 30 minutes until the pudding sets.

7. For the sauce, put the water, sugar and cinnamon stick in a small pot and bring to boil. Let it boil for a few minutes until the cinnamon flavour is infused into the liquid.


So tell me, what did you plan on becoming? I'm curious about how many people actually become what they had dreamed of.

Read more...

Baguette with Prawn and Cream Cheese + Baker's Delight giveaway!

>> Sunday, November 7, 2010

One of the things on my to-learn list is to make my own bread.

I mean, you can imagine how satisfying it must be to bite into your homemade sandwich right? (Better yet, grow the vegetables and butcher your own meat to make that sandwich!)

But so far in my kitchen I have been shying away from yeast. It's just one area that I have a really bad feeling about. So I am just going to continue buying my bread until I overcome this fear of yeast...and of course, until I have time to do such thing.

Luckily for me, when I first moved to Melbourne a few weeks back, Baker's Delight sent me some of their new Artisan range - which includes a Ciabatta, Turkish Bread and French Baguette (go to the end of this post for instructions on how you can score a voucher to sample one of this new range from Baker's Delight!) I was delighted because at that time I could not see a Baker's Delight in my area and also because I had a whole bunch of ideas on what I could make with these.

I was told that all of the breads from this new range are crafted by hand, allowed to rest for 20 hours and then baked on stone for a crusty finish. Sounds good to me!

I couldn't wait to get my hands on the ciabatta. It is one of my all time favourite bread and I love it because of its delicious crunchy crust and porous and chewy interior.

Doesn't this ciabatta look beautiful?

Straight away, I filled the ciabatta with whatever ingredients I had in my fridge and toasted it in the oven.

Before going into the oven...

So goood. I was in a bread coma afterwards that I went back to bed for the rest of the Saturday morning....


I noticed the baguette was bigger and wider than the baguettes I normally see at the markets. So I had an idea...actually I had two. So I only used half of the baguette for this...


This is a french baguette stuffed with prawns, asparagus and cream cheese and I guess it's appropriate for the upcoming summer because it is not meant to be eaten toasted (otherwise the fillings will melt!) They go beautifully as an entree/snack or served as a side with some white wine!

Of course, the bread centre didn't go to waste, they were stuffed back as fillings ;)


I didn't have anyone to share these delicious baguettes with so I ate them all myself (don't judge me!) They were garlicky, creamy but not overly so - just the way I like them. They may look a bit fancy but they are in fact quite simple. But I do recommend that you share these over a meal with friends. Bring this over to their place for your next gathering. Just because food tastes better when shared...especially the entertaining season is now upon us with the longer daylights!

Oh, and don't forget to scroll to the bottom of the post to find how how you can win the vouchers! :D


French Baguette with Prawn and Cream Cheese
Adapted from Masa cookbook
  • 1/2 Baker's Delight French Baguette
  • 100g cream cheese
  • 1 tbsp butter
  • 2 tbsp mayonnaise
  • ~8 prawns (fresh uncooked only!)
  • drizzle of white wine
  • 4-5  stalks of asparagus (chopped to around 3cm)
  • 4-5 cloves of garlic (or less if you don't like garlic), chopped finely
  • salt and pepper to taste
1. Combine the cream cheese, mayo and butter in a bowl and let them sit at room temperature until soft.

2. Peel the prawns and devein.

3. Add a bit of oil in a pan and add the garlic. Just before it turns brown, add the raw prawns.

4. When the prawns have turned red, add a drizzle of white wine (optional).

5. Add the asparagus into the pan (I have slightly boiled the asparagus before hand) and stir around until the asparagus are fully cooked through. Turn of the heat and let it sit until cool.

6. With the 1/2 baguette, cut off the end of it. With a small knife, insert it into the centre and carefully cut around the border and remove the inside. Be carefully not to remove too much and also reserve the innards for the filling later on.

7. Make sure the cream cheese mixture from step 1 has softened. Mix them well together and add in the centre cut out bread from step 6 above.

8. Once the prawn and asparagus have cooled down (do not use when still hot/warm) add them to the cream cheese mixture and combine. Taste as you go along and add salt and pepper to taste.

9. Stuff the filling inside the hollow baguette with a small long spoon.

 How was it that I was able to take this photo whilst filling? They don't call me a multi-tasker for nothing ;)

10. Wrap the filled baguette with plastic wrap/cling film tightly and store in the fridge for a few hours until the fillings have set properly.

11. To serve, eat the sliced baguette at room temperature. Do not bake as the fillings inside will melt!


Now, for your chance to win 1 of 5 $5 vouchers to be used in any Baker's Delight store in Australia...

How to enter:

All you have to do is leave a comment on this post! :)

Oh and why not tell me what your best 'match' is with your favourite bread? This would be one of your recipes, your favourite cheese and wine or even a gourmet sandwich!

  • The 5 winners will be chosen at random.  
  • This giveaway is only open to Australian residents only.
  • If you do not have a blogger account, just select 'Name/URL' next to 'Comment as' and remember to leave your e-mail addresss so I can contact you for your mailing address.
The Baker's Delight giveaway closes on Sunday 5th December 2010 at 10pm AEST and the winner will be announced on Monday December 6th 2010.

Have a blessed week ahead and I hope you smile :)

Read more...

Avocado Key Lime Pie

>> Wednesday, November 3, 2010

Once in a while, I will come across recipes (either from cookbooks or other blogs) which make such big impressions on me that I wouldn't be able to stop thinking about them (not in an obsessive kind of way of course!)

That's when I add these recipes to my stickies labelled 'Must make soon' on my desktop. (Mac's stickies are great for my never-ending lists!) 

So the other day I came across such recipe when I was reading Deborah's Taste and Tell where she interviewed Jenny of Delightful Delicacies. Jenny shared that her favourite recipe on her blog is this...

Avocado Key Lime Pie.

Strange. Intrigued. Must try. Oh and love the green!


I couldn't wait to try it out because not only have I never had a key lime pie before but it has avocados in it which are in season right now. I know the normal key lime pies has a lot of eggs, condense milk and sometimes cream. This recipe has none of that stuff (though I still do want to make the original version one day). Just the simple avocado, lime, coconut oil and some honey/maple syrup. I was also so intrigued about the recipe because in her post, Jenny mentioned that you'd never know that the main ingredient is avocado! 

How cool is that? Using wholesome ingredients to achieve the same creaminess and yummy factor! Definitely the kind of recipe I like to experiment with!


I do avoid buying an ingredient for a recipe in which I know I will only ever use once (and after that, the said ingredient will live the rest of its life in my pantry until its end of life...or until I do a pantry spring clean). In this case, it's the coconut oil. I've hardly ever come across recipes which calls for coconut oil. So how do I justify myself in buying this especially the ones I could find in my area are super expensive. 


That's when I remembered watching a show ages ago about coconut boil being used as a beauty product! It is great for your skin and hair (or so says all the coconut oil makers...)

My hair is definitely dry and brittle these days from the crazy Melbourne weather...getting the coconut oil would help me in not just in the stomach compartment but also the hair as well! Perfect. (I'm not sure about smearing this on my face yet...let's just start with the hair first).

Oh and apparently coconut oil is great for treating head lice and hair loss as well...so if you have one or both of these problems, I'd recommend that you run to the shops to get this oil...and make this pie as well of course!


Ok the moment of truth - taste test. This avocado key lime pie most definitely does not taste like it has avocados in it! It is lime-y/tangy and deliciously creamy. It tastes like a tropical island...with a hint of coconut fragrance. I love how the hazelnut and pecan crust adds such a contrast to the smooth filling.

So go make it if you have those extra avocados lying around. You won't regret it!

Avocado Key Lime pie
from Delightful Delicacies
Serves 4 (I halved the recipe)
  • 4 1/2 ripe avocados
  • 1/2 cup maple syrup
  • 2/3 cup freshly squeezed lime juice
  • zest of 2 organic limes
  • 4 to 6 Tablespoons coconut oil, melted **
  • a few slabs of young coconut meat (optional)
  • large pinch of salt
  • healthy dash of vanilla
hazelnut and pecan pie crust
  • 1/2 cup of filberts (hazelnuts), finely chopped
  • 1/2 cup of pecans, finely chopped
  • 2 Tablespoons agave nectar, honey or maple syrup
  • 1 Tablespoon coconut oil, melted
  • 1 1/2 teaspoon cinnamon
  • dash of vanilla
  • pinch of nutmeg
  • pinch of salt
1. Combine chopped nuts, cinnamon, nutmeg and salt in a bowl. Whisk together melted coconut oil, agave and vanilla, add to nut mixture. Press into pie plate. Bake about 10 minutes at 350 degrees Fahrenheit (~176C). Allow to cool completely before adding pie filling.


2. Combine all ingredients in a good blender or food processor, blend until creamy and smooth. (I don't have a food processor so I used a potato masher :P


Avocados with lime zests

3. Pour into this pie crust, and serve immediately topped with a little bit of toasted coconut or rice whipped cream, yum!


Jenny's notes:

If you want it to firm up a bit before serving, let it sit in the refrigerator for a little while before serving. 

** If you are adding the coconut oil be sure it is melted, then as everything is blending pour it in a constant stream. Let the pie chill for a bit as the coconut oil will solidify and help the pie to be a little thicker. 

Read more...
Related Posts with Thumbnails

  © Blogger template Simple n' Sweet by Ourblogtemplates.com 2009

Back to TOP