These are a few of my favourite things...

>> Thursday, September 16, 2010


I'm taking a break from posting what goes on inside my kitchen so this is a rather random post which includes some food related photos taken recently across 3 cities (Sydney, Taipei and Tokyo). Each item deserve an entry of their own really, but at the rate I'm going, I'll probably never get around to it ;-)

So...here's my list in no particular order!

1. Ding Tai Fung's Loofah (sponge gourd) dumplings - Taipei

The loofah dumpling is a favourite of mine at Ding Tai Fung's - I'm not sure if this is on the menu in Sydney yet? I also saw on the menu there are truffle dumplings! I thought I read it wrong and had to ask my parents to translate the Chinese words for me. They were without doubt the most expensive item on the list (around 4 times the price of the other dumplings)...maybe I should give it a try before I leave!?

Love the translucent skin that you can almost see the green loofah inside!
Delicious dumplings in the making!
2. Dried lychee, goji and walnut loaf - Taipei

It's not hard to notice that everyone's into their bread these days in Taiwan. Why? Because Taiwanese baker Pao-Chun Wu won the championship at the Masters de la Boulangerie in Paris this year. His winning bread contains dried lychee (longan), millet wine and rose - what a combo! While I cannot buy his award winning bread (apparently there is a waiting list), this baker has passed on his recipe to several outlets in Taiwan! I got the longan, goji and walnut loaf from an Tanhou, an organic store recently....divine! I ate the whole thing in one sitting!

It's a lot tastier than it looks ;)
Longan, goji and walnut chewy goodness!
3. Gouter de Roi's Gateau Rusk - Tokyo

If you see an extremely long line at the food section in a department store in Tokyo, it's likely that those Tokyoites are lining up for these delicious rusks! I'm sure if carry one of their bags in Tokyo, you'll be the envy of everyone around you! And if you receive this as a gift from someone, you should feel all warm and fuzzy inside - because someone just waited in line for who knows how long just to get these for you!

These are lovely with just the right amount of crunchy sweetness! I'd happily munch on these if someone is willing to get them pour moi. Are they worth waiting in line for 1+ hours? Personally, I think not. 


4. Oriental and Continental Foods - Sydney 

I'm still trying to find my grounds with spices and would like to incorporate more of them into my meals. So part of the fun for me is to discover spices that I have not used before and test them out in my cooking...which sometimes leads to inedible curries.

Oriental and Continental Foods in Artarmon is where I do my shopping for spices. They have a good range of spices that you can buy in bulk (although not as comprehensive as Herbies) so they're much cheaper than the ones you get in the supermarket. Oh and they have cardamom seeds which I really like because it saves me time from cracking open the pods (and they're much more fragrant than the grounded version).
Loading up on goodies including - cardamon pods, peppercorns, rock salt, henna, macadamia nuts and almond meal!
Nutmegs perfumes my soups and cookies. Gotta love them!
5. Ton Sushi 童壽司 - Taipei

This is one of my favourite Japanese restaurants in Taipei. It's owned by a family friend's sport buddy so this is our usual meet up spot whenever I am in Taipei! All their sushi and sashimi are incredibly fresh and makes me drool whenever I think about them. Like right now.

Treasures of the sea?!
Deep fried shredded burdock with mashed potato and mayo - my favourite!
6. Crocs - Worldwide

Ok, this is not croc meat nor restaurant. But I'd like to say how comfy these crocs are in taking me places during my travels. They haven't been off my feet for the past few weeks. Or maybe I just like to take photos of my feet. Most girls go through this phase apparently in their teenage years. I must be a little bit behind!

7. Pendolino - Sydney

You know sometimes you're just looking for a slightly fancier restaurant in the Sydney CBD but you don't want to empty out your wallet or sit through a 3 hours 12-course meal? I reckon
Pendolino (one-hat) would be a great choice for that occasion! To most people, this Italian eatery is probably more well known for their speciality olive oils that you can purchase them from their gift shop.

It is also at this restaurant that me and my dear friend E made plans for number 8 below. :)

Quaint and warm ambiance
Handmade Half Moon mezzalune ravioli with braised pork cheek, fava beans, crisp pancetta and pork cheek sauce

8. Sepia - Sydney

I used to work at 201 Sussex Street. Sepia is located at 201 Sussex Street. See the connection? No, I never worked there! But this two-hatted restaurant (where owner Martin Benn won the Good Food Guide's Chef of the Year 2011) is housed in a complex where I used to work and I remember times when I walked past and wondered when I'll get to food splurge there.

So one of the first things I did after handing in my resignation is to make a reservation at Sepia. Degustation dinner is $130pp for a 10-course meal or you can get their Winter menu at $80pp. There are also A La Carte's to choose from.

I went for the 10-course set and here are some of the memorable dishes:

Yellow Fin Tuna Tartare, Warm Dashi Custard, Soy and Wasabi Jelly, "Popped Pork" and Nori Salt, Wild Green Elk
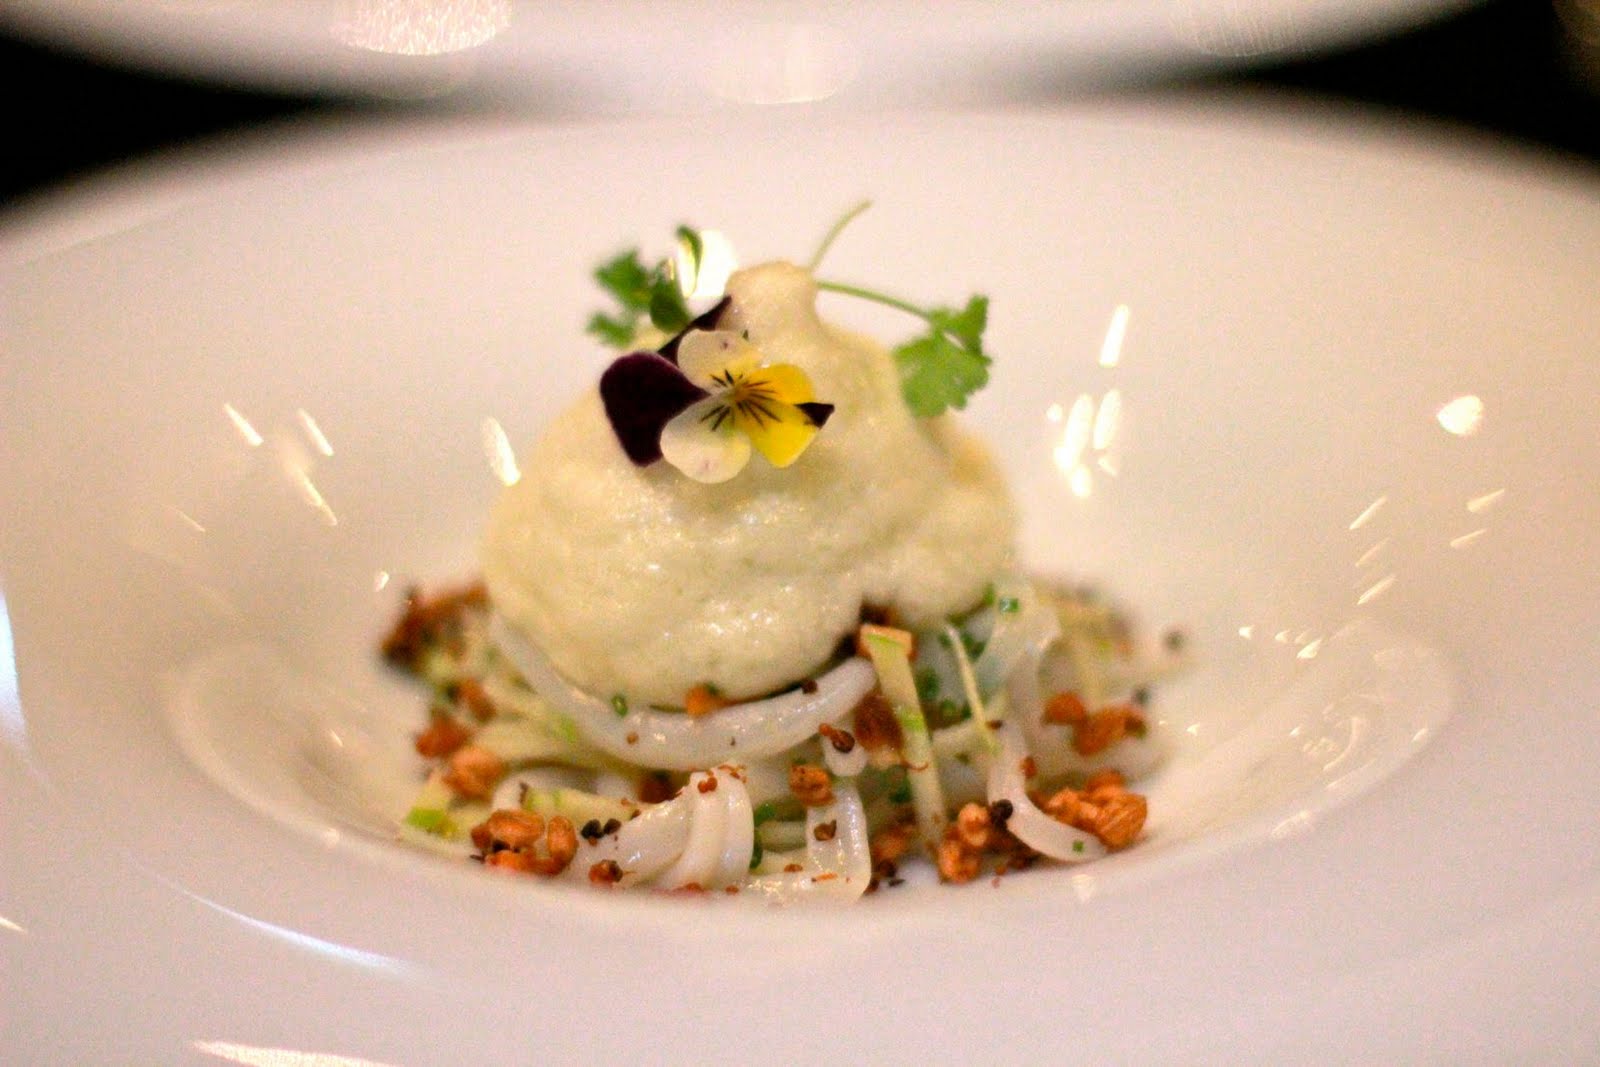
Squid pasta with an "apple salad" of Bison Grass vodka and apple mousse, with toasted grains.
Sansho Roasted Pasture Fed Angus Beef Tenderloin, Braised Short Rib, Buffalo Milk 'Tofu', Roasted Quinoa
'Chocolate Forest' - Soft Chocolate, Lavender Cream, Sour Cherry Sorbet, Licorice
9. Bacco Wine Bar Pasticceria's cannoli - Sydney

To get my sugar fix on a working day, I used to walk to Bacco at Chifley Plaza during my lunch breaks. It's a good 20 minutes walk each way, but it's so worth it! They have an amazing selection of desserts including their popular chocolate mousse and strawberry tarts, but my favourite is still their cannoli!

During my last week at work, my lovely colleague B bought some to share with us! /<3

Is there a good recipe out there for this? I'd love to learn to make it.

Cannoli @ $3.50 each! The ricotta filling...hmmmm.
10. Peaches - Tokyo

Sometimes at the end of the day, nothing beats a juicy peach that dribbles down your chin as you bite into it. 


Read more...

Bourke Street Bakery + Carrot cake recipe

>> Thursday, September 9, 2010

One fine Sunday after church, Sister and I were due to have lunch at Friend's so we decided to drop by the famous Bourke Street Bakery nearby to pick up a few items.

One should never turn up at a friend's empty-handed. This is instructed in Mother's book of etiquette.

This tiniest bakery is located at a small corner in the artsy Surry Hills and from afar, I could see a long line of people waiting for their lazy Sunday's caffeine and pastry/pie fix.

In my book of etiquette, one should also never turn up at a friend's famished and low on sugar. It may result in unsightly and unlady-like table manners.

Something has to be done about it. So we indulged in....

the smoothiest and flakiest chocolate tart...

beef brisket pie and pork & fennel sausage roll...

And packed the following for post-lunch treats at Friend's:

Lemon tart (I think I prefer Pierre Herme's recipe to this)...

Ginger brulee tart (so delicious - must try their Strawberry brulee tart next time)...

Carrot cake (see below for recipe)...


Bourke Street Bakery
633 Bourke Street Surry Hills (Corner Devonshire Street)
Tel: (02) 9699-1011.
Hours: Tue-Fri 7am-6pm
Sat-Sun 8am-5pm


I've started to see a trend recently - I love to incorporate veges and fruit in my baking! This carrot cake is definitely one fine example of it!

For this recipe - I substituted self-rising all purpose flour for self-rising wholemeal flour, which may be the reason why my cake didn't rise. I also omitted the cream from the frosting and used Greek style yoghurt as a substitute.

BSB's Carrot Cake
Serves 10
  • 70 g (2 1/2 oz) walnuts
  • 150 g (5 1/2 oz / 1 cup) self-raising flour (I used self-rising wholemeal flour)
  • 1/8 tsp baking powder
  • 1/8 tsp bicarbonate of soda (baking soda)
  • 1/4 tsp ground cinnamon
  • 1/8 tsp ground cloves
  • 1/8 tsp ground nutmeg
  • 1/4 tsp salt
  • 55 ml (1 3/4 fl oz / about 2) egg whites
  • 60g (2 1/4 oz / 1/4 cup) sugar for egg whites (I halved this)
  • 1 egg
  • 1 egg yolk
  • 160g (5 3/4 oz / 3/4 cup) sugar for egg yolks (I halves this)
  • 170 ml (5 1/2 fl oz / 2/3 cup) extra light olive oil
  • 125 g (4 1/2 oz) carrots, peeled and grated
Cream Cheese Frosting:
  • 20 g (3/4 oz / 1 tsp) icing sugar, plus extra, for dusting
  • 20 g (3/4 oz / 1 tbsp) butter, softened
  • 145 g (5 1/4 oz) cream cheese
  • 40 ml (1 1/4 fl oz / 2 tbsp) pouring (whipping) cream (35% fat) (I used greek yoghurt instead)
Method

1. Preheat the oven to 200C (400F). Grease an 18 cm (7 inch) round cake tin and line the base and side with baking paper - the paper should protrude about 2.5 cm (1 inch) above the tin.
2. Place the walnuts on a baking tray and cook for 4-5 minutes, or until lightly roasted. Cool and cut into thirds. Sift the flour, baking powder, bicarbonate of soda, spices and salt into a bowl. Repeat to ensure they are evenly mixed.
3. Put the egg whites in a very clean bowl of an electric mixer fitted with a whisk attachment. Beat the egg whites on high speed until soft peaks start to form. Slowly pour in the sugar for the egg whites, while the motor is still running, being careful not to overmix - the meringue should reach soft peak stage. Quickly transfer the meringue to another bowl and set side until needed.
4. Put the egg and egg yolk in the bowl of the electric mixer and add the sugar for the egg yolks. Mix on high speed for 3-4 minutes, or until the mixture doubles in volume and is quite airy. With the motor still running, slowly pour in the oil in a thin stream being careful that it doesn't split or deflate too much.
5. Remove the bowl from the mixer and with a spatula or gloved hand, gently fold in the flour mixture until combined. Fold in the carrots and walnuts. Quickly and lightly fold in the meringue - do not fold it through completely, you should still be able to see streaks of meringue through the mix.


6. Pour into the preapred tin and bake for 1 hour 10 minutes, or until a skewer inserted into centre of the cake comes out clean.
7. Meanwhile, make the cream cheese frosting. Cream the icing sugar and butter in the bowl of an electric mixer until pale and smooth. Add the cream cheese in small amounts, allowing it to completely incorporated before adding the rest. Scrape down the sides of the mixing bowl during this process to ensure even mixing. Add the cream and mix until smooth, being careful not to overmix at this stage or the cream may curdle and separate. If using a different type of cream cheese for this recipe you may need to add a little more cream - the frosting needs to be of a spreadable consistency but not at all runny.
8. Remove the cake from the oven and allow to cool in the tin for about 30 minutes before turning it out onto a wire rack to cool completely. Using a serrate knife, slice horizontally through the centre of the cake to form two even-sized layers and fill with cream cheese frosting.

9. Dust the top of the cake with icing sugar to serve.

Verdict?!

My version is definitely a little bit more dense than Bourke St. Bakery's as I used wholemeal flour instead. I would also recommend that you half the sugar as I did...it's sweet enough (I guess that is a personal preference). Nevertheless, the cake is still delicious with crunchy wholesomeness from the walnuts and full of aroma from the spices!

Read more...

Chocolate & Zuchinni Loaf

>> Sunday, September 5, 2010

I haven't been so excited about a loaf in a long time. Until today.

Chocolate and zuchinni.

They're like that unlikely couple you knew from school. When you first found out they were going out, you thought 'Are they nuts?'

But once you saw them together, you began to think, 'Hang on there, they are actually kinda cute together...'

In the relationship, the zuchinni would be the one working 'behind the scenes'. It keeps the cake super moist so that you don't need to add much (or any) butter and it is content in not receiving any attention and being overpowered by the rich and sexy chocolate.

I've wanted to give this combo a try for some time now, and recently when I read about it from Asha in her lovely blog, I was sold! I loved how she described the zuchinni as being 'altruistic'. I adore that word. I first saw that word inside the lower lip of a friend. He had it tattooed there. A great and traumatic way to remember vocabularies.

Can I also tell you something? I was sure this cake would fail. I didn't follow a recipe in particular and mucked around with the ingredients. You see, I wanted to make it healthier. If my next job doesn't work out, I may have a chance of becoming a nutritionist.

So there I was, whisking together some grated zuchinni, chocolate pieces, spelt flour, extra virgin olive oil and greek style yoghurt. Very worried. Doesn't seem...appetising?

In the oven it went and I had a flashing vision of the baked good down my rubbish chute. Timer beeps.

Sliced into the loaf. Seems like your everyday chocolate loaf. Just not exactly great looking.

A quick bite. Tastes like your everyday chocolate loaf...but so much more moist and soft.

It's lovely stuff.


Just don't forget about the selfless zuchinni in there.
Chocolate & Zucchini Loaf

  • 120 grams (1 cup) spelt flour (or alternatively, use all purpose flour)
  • 30 grams (1/4 cup) unsweetened cocoa powder
  • 1/2 teaspoon baking soda
  • 1/4 teaspoon baking powder
  • 1/4 teaspoon fine sea salt
  • 50 grams light brown sugar
  • 60 grams (1/4 cup) virgin olive oil (or unsalted butter at room temp)
  • 1/2 teaspoon pure vanilla extract
  • 1/2 teaspoon instant coffee granules
  • 1 large egg
  • 60 grams Greek style yoghurt (or any other plain yoghurt)
  • 175 grams (1 cup) unpeeled grated zucchini
  • 80grams (1/2 cup) good-quality bittersweet chocolate chips
  • A few tbsp skim milk (optional)
  • Confectioner's sugar (optional)
1. Preheat the oven to 180°C (350°F).

2. In a medium mixing bowl, whisk together the flour, cocoa powder, baking soda, baking powder, and salt. In the bowl of a mixer (or by hand in a large mixing bowl), beat the sugar and oil (or butter) until fluffy. Add the vanilla, coffee, yoghurt and egg, mixing well between each addition.

3. In a large mixing bowl, combine the zucchini, chocolate chips, and about a third of the flour mixture, making sure the zucchini strands are well coated and not clumping too much.

4. Add the rest of the flour mixture into the egg batter. Mix until just combined; the batter will be thick.

5. Fold the zucchini mixture into the batter, and blend with a spatula without overmixing. Pour into the cake/loaf pan, and level the surface. (I added around 2 tablspoons of skim milk here because the batter seems too heavy).

6. Bake for 45- 50 minutes, until a knife inserted in the center comes out clean. Transfer onto a rack to cool for 10 minutes, run a knife around the pan to loosen, and unclasp the sides of the pan. Serve slightly warm or at room temperature. Sprinkle with confectioner's sugar.

Read more...

Layered Fruit Agar Agar

>> Sunday, August 29, 2010


Have you ever woken up with the thought

"Omgosh, please tell me I didn't do that yesterday...that it was only a dream, right?"

I did. This morning actually.

Yesterday was the last day of my first full-time job. It's been 3 years. So I did the ugly cry in front of the now ex-colleagues (some looked worried and probably wondered if I'd lost it). I had envisioned that would happen hours before the actual incident. They call it the self-fulfilling prophesy. I call it overactive tear ducts.

But the good news is...I'm about to jet-off and start my holiday now so I can pretend I have a short term memory loss. It's a between-job holiday. Or just an unemployment stint.

I will leave with you the simple recipe for the fruit layered agar agar in the meantime.

And see - I told you I was going to incorporate agar agar into my everyday diet!

Fruit layered agar agar
  • Fruits of your choice (try not to use kiwifruit, pineapple and papaya as they have enzymes which may prevent the agar from setting).
  • 4 cups water (or you can use juice - I'd probably use lychee or apple juice next time!)
  • Honey (to taste)
  • 2 tsp agar agar powder
1. Bring the water with the agar agar powder and honey to boil.

2. Pour a thin layer of liquid from the above step to your container of choice before layering the first layer of fruit (in my case strawberries)

3. Once you add the first layer of fruit, pour another layer of the agar agar liquid on top - let it sit for around 2-3 minutes before you layer on second fruit of choice.

4. When done with the layering, place the container into the fridge for around 2 hours!

Read more...

Coconut, Red bean and Matcha Agar Agar

>> Wednesday, August 25, 2010

Let's talk healthy (or heathier) today.


So you've just had dinner...and it is now time of the night when you scour the kitchen for desserts. So what do you find? Ice-cream, chocolate (with sea-salt!), or cakes? No? C'mon, I can't be the only one!

Ever since my recent over-indulgence in Japan, I've been thinking a lot about low fat desserts. Is that even possible?!


Then I magically found agar agar (kanten in Japanese) in my pantry.

You know what's so lovely about this stuff?

It is made of approximately 80% fibre and as you digest, it increases in volume in your stomach by absorbing the water...which means, you'll be fuller quicker than ever!

Oh and you know what else I love about it? Unlike your usual gelatin, it is all-vegetable (extracted from seaweed) and completely odourless! Thank goodness. Is it just me or does gelatin smell really bad when you boil it?

Many sites I have came across boast that agar agar is completely fat-free, has 0 calories and 0 sugar and carbs. While I don't know how accurate these sources are, I'd say it has been a great replacement to my usual ice-cream lately!

I have tested with one of my favourite food combinations...


Matcha and red beans with coconut....in 2 different versions.

Oy, isn't variety the spice of life?

This is probably the easiest dessert recipe you'll ever find. All you need to know is...

...for every 1 cup of liquid, add 1/2 tsp of agar powder. Really. That's all. The rest, taste as you go along.

Coconut, Red bean and Matcha Agar Agar - Version #1

Coconut layer
  • I tbsp demerara sugar (depending on how you like it)
  • 1 cup low-fat coconut milk
  • 1 cup water
  • 1 tsp agar agar

Red Bean layer

  • 1 tblsp demerara sugar
  • 2 cups water
  • 1 cup (or more depending on preference) cooked red bean (boil in water for 45 mins)
  • 1 tsp agar agar powder

Matcha layer

  • 1-2 tsp matcha powder
  • 2 tblsp condensed milk (ok, this isn't healthy stuff I know)
  • 1/2 tsp agar agar powder
  • 1 cup low-fat milk

1. Pour the coconut milk and water into a saucepan and add the agar agar powder. Let rest for 10 minutes.


2. Add in the sugar and bring the liquid to boil.


3. Once sugar has dissolved, pour the liquid into your preferred container. It should set within 20 minutes.


4. Pour on another layes once the previous layer is about to set. Then refrigerate for 2 hours.


Follow the above methods for the other layers...

Note: with the red bean layer, before you pour the red bean onto the coconut layer, maybe sure you pour a small layer of the liquid first then wait for a few minutes before placing the beans and pouring the rest of the liquid over it. This will ensure that the layers stick together better.

Coconut, Red bean and Matcha Agar Agar - Version #2

This version uses exactly the same ingredients as the above step minus the 2 cups of water with the red beans. I just combined the coconut water with the red beans and omitted one layer.

I also used a different type of green tea (you can obviously see the beautiful vibrant green in this second version. Make sure you use fresh and good quality green tea (matcha) powder. It makes a whole lot of difference. The one I used in the first version was about to expire!


I've now a list of other flavour combinations that I can't wait to try.

Imagine lycee with rasperberries... rosewater with pomegranates...

Go on, give agar agar a chance....

Read more...

Chocolate-Banana Marble Bread

>> Sunday, August 22, 2010


I'd put banana bread in the same category as my childhood friends - it's been in my life for as long as I can remember (and also the first thing I've baked in my life), and we've been through a lot together.

Good days, bad days, un-inspired days...the day when I resigned from my first full-time job (last week)...well, what else but banana bread!

Maybe what I love is the practicality of it. Like an all-purpose baked good that you can use in all situations. I mean, it really is the answer to some of life's toughest situations...like when you are:

a) so late for work and don't have time to make breakfast

b) incredibly stuck at work and the only thing left to do is to bribe colleagues with baked goods

c) in need to make your house smell truly domesticated...(there is a reason why banana bread is in Nigella's How to be a domestic goddess)

d) required to bake something at the last minute for people which says I-need-to-impress-but-I-don't-want-you-to-know-so-I-made-this-to-feign-indifference (don't under-estimate the power of the humble banana bread!)

Today, I introduce to you a fancier banana bread with a twist (of chocolate).

This is the first time I've used this recipe and the process is definitely more lengthy than my usual one (which I will post up another day!)

Chocolate-Banana Marble Bread
Adapted from The Art and Soul of Baking

Note: The recipe calls for cake flour instead of the usual all purpose flour. You can make your own cake flour: for every cup of cake-flour required by the recipe, take a cup of all purpose flour - remove 2 tablespoons of it and replace it with 2 tbsp of cornflour. Then sift 5-6 times.
  • 2 large or 3 medium very ripe bananas, at room temperature
  • 1/4 cup (2 ounces) buttermilk, at room temperature
  • 2 teaspoons pure vanilla extract
  • 2 cups (7 ounces) sifted cake flour (see note above)
  • 1 teaspoon baking soda
  • 3/4 teaspoon baking powder
  • 1/4 cup (1 ounce) unsifted unsweetened Dutch process cocoa powder
  • 3 tablespoons (1 1/2 ounce) boiling water, plus more if needed
  • 1 1/2 sticks (six ounces) unsalted butter, softened
  • 1 cup (7 ounces) sugar
  • 2 large eggs at room temperature
Preheat oven to 350 degrees F and position an oven rack in the center. Lightly coat the loaf pan with melted butter or high-heat canola-oil spray and line it with a piece of parchment paper that extends 1 inch beyond the long edge of both sides of the pan. Peel the bananas and place them in the bowl of the food processor.

Process to a smooth puree, or mash them in a bowl using a fork. Measure 1 cup of the puree and transfer it to a medium bowl, discarding the rest of the puree or saving it for another use. Add the buttermilk and vanilla and whisk just until blended. Set aside.


Use a fine-mesh strainer to sift the cake flour, baking soda, and baking powder together into a medium bowl. Whisk to blend well. Set aside. Place the cocoa powder in the small bowl. Pour the boiling water over the coca and stir until it forms a smooth paste — it should run thickly off the spoon. If it is too thick, add another tablespoon of boiling water and stir again. Set aside.


Place the butter and sugar in the bowl of the stand mixer. Beat on medium-high speed until the butter is very light, almost white in color, 4 to 5 minutes. Scrape down the bowl with a spatula. Turn the mixer to medium speed and add the eggs, 1 tablespoon at a time, completely blending in each addition before adding the next. About halfway through the eggs, turn off the mixer and scrape down the bowl with the spatula, then continue adding the rest of the eggs. Scrape down the bowl and finish blending the batter by hand.

Transfer half of the batter to the second medium bowl. Add the cocoa paste and, using the rubber spatula, gently but thoroughly blend it into the batter.

Drop alternating spoonfuls of dark and light batters into the prepared pan, but marbleize by using a spoon to gently turn the batter over in 3 places down the length of the pan.

Bake the banana bread for 55 to 65 minutes, until firm to the touch and a toothpick inserted into the center of the loaf comes out clean. Transfer to a rack to cool completely. When cool, remove from the pan, peel off the parchment paper, and cut slices by sawing gently with a serrated knife.

While this banana bread is quite good (very soft and refined), I don't really think it is all that necessary to spend so much time on a banana bread (unless you do have the time!). Normally making banana bread is a one bowl task for me, but with this recipe be prepared to do a little bit more washing up ;)

Read more...
Related Posts with Thumbnails

  © Blogger template Simple n' Sweet by Ourblogtemplates.com 2009

Back to TOP